Edit1 Generating Deposits
Deposits refers to the process of accounting for all payments entered into XMS. The
Deposit process will check all payments for consistency and create a deposit report with transmittal statement, receipts and invoices. It does
not move any money around. Credit card payments are automatically processed through
ViaWarp. Checks and cash are brought to the bank together with the transmittal statement generated by the deposit.
Deposits are typically generated each day for the income received on the previous day.
To generate a deposit, select
Deposits → Post Deposits from the
Top Menu. Depending on various factors, XMS can show you the following:
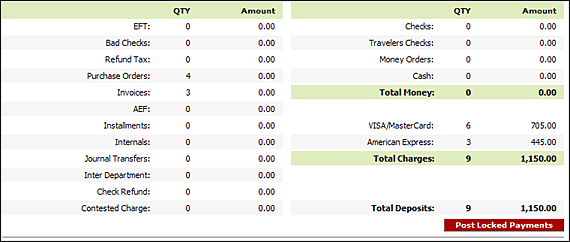
- An overview of quantities and amounts reflecting payments locked by you for deposit.

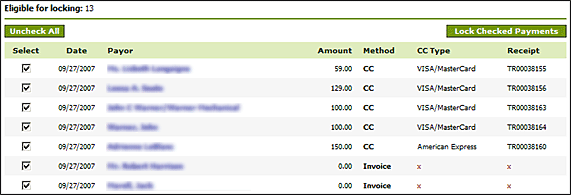
- A list of payments eligible for locking. These payments are balanced and can be locked for deposit.

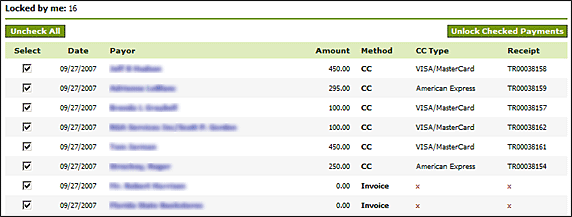
- A list of payments already locked. If the payments are locked by you, you will see the overview and have the ability to unlock the payments. You have no access to payments locked by others.

- A list of unbalanced payments. These payments cannot be included in a deposit unless they are balanced. To solve the imbalance, click the payor's name and fix what needs to be fixed. Upon saving the payment, you'll be brought back to the deposits page.
 Edit
Edit1.1 Locking Payments
Payments eligible for deposit are checked for locking by default. Uncheck any payments you want to exclude from the deposit. Click the
Lock Checked Payments button to lock the payments for deposit.
Edit1.2 Posting the Deposit
The overview gives a summary of every type of payment to be deposited and posted. Review this screen carefully. If you find any errors or inconsistencies, you are able to unlock the payments and make corrections. If the locked payments totals do not match your settlement, find the discrepancy and correct it. Once you are certain the summary is correct, click the Post Locked Payments button. You will be asked to confirm that you want to post the locked payments. Click Cancel if you want to go back to make any corrections necessary. Click Continue to post the payments. After this, you will not be able to make any corrections. If the deposit was successful, you'll be brought straight to the Deposit Reports page.
ATTENTION: A posted deposit cannot be reversed or undone.Edit2 Deposit Reports
You will get to the
Deposit Reports page after a successful deposit or by selecting
Deposits → Deposit Reports from the
Top Menu.
The top portion of the screen directs you to set specific page parameters so the reports print correctly. Follow the directions explained before continuing, which you will need to do only once. Print each type of report separately. Select the date the payments were deposited, not the date they were entered.

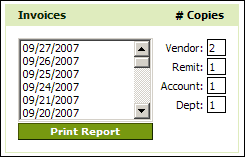
For Invoices, if need be, change the numbers of copies on the right side of the window.

Each report will appear in a web browser window. Once you have printed the report, click the browsers back window to return to the
Deposit Reports screen to continue printing reports.
Once you have finished generating deposits in XMS, enter the proper information into
PeopleSoft through
MyUFL.
Follow the procedures for deposits on the
Human Resource Services website by visiting the
Deposits Toolkit.
Edit2 Bank Receipts
After taking the actual deposits and transmittal to the bank, the bank will issue receipts for the deposits. These receipts should be entered into XMS. To do so, select
Deposits → Bank Receipts from the
Top Menu. You will be asked to enter a date range, or leave the start date blank to pull up
Bank Receipt data for the last three months. XMS will show you a list of all
Deposits, in which you can enter the date the deposit was made at the bank and the receipt number received from the bank.