Edit1 Creating a New Student
From the
Top Menu, select
Registration → New Student.
As mentioned, this is a new
Student record that has not been saved to the database yet. The minimum requirement for a new
Student to be saved to the database is that (s)he has a
First Name, Last Name and
UFID.

Fill in the following fields:
- Prefix: The prefix of the student.
- First Name: The first name of the student.
- Middle Name: The middle name of the student.
- Last Name: The last name of the student.
- Suffix(es): Any suffixes, like Jr., III, or degrees.
- SSN: The social security number of the student.
- UFID: The UFID of the student.
- Birth Date: The date of birth of the student.
- Gender: The gender of the student.
- Ethnicity: The ethnicity of the student.

- Title: The title of the student.
- Company 1 and 2: The company or companies the student is affiliated with.
- Attended UF: Whether the student has attended the UF before.
- Name Tag 1 and 2: The first and last name that the student wants to appear on his or her name tag. This will usually be the actual first and last names.
- FL Resident: Whether the student is a Florida resident.
- Drivers License and State: The number and state of the student's drivers license.

Fill in the location where the lives.
- Comments: Enter any miscellaneous notes about the Student which only other XMS users will see. Check the Attention box to flag the student, so that he or she will be marked in searches and when registering. This will make the comments available to the user.
At this point, click on the
Save Changes button to save your data and create the
Student. A
Student ID will be automatically assigned as a unique numeric identifier for this
Student.
Edit2 Managing Student Details
Once the Student has been created, you can administrate the associated Mailing Lists, Programs and Licenses. To do so, click on the corresponding
Manage ... button.
Edit2.1 Mailing Lists

Here you can add the student to specific Mailing Lists.
Edit2.2 Programs

Here you can associate the student with specific Programs.
Edit2.3 Licenses

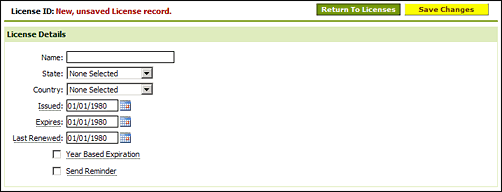
Here you can manage various licenses held by the student.